1、设置“windows live writer ”图像上传:日志-编辑日志设置-图像
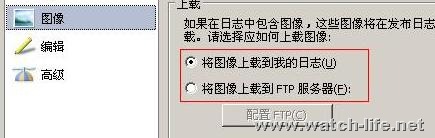
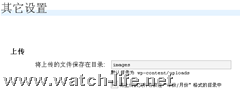
有两个选项,第一一个选项“将图片上载到我的日志”,是通过http方式上传到博客空间。如果选择这项,相应的在wordpress中必须设置上传的目录,设置的地方:管理-其他,设置的目录有“写权限”。
如果选择“将图片上载到我的ftp服务器”,则必须配置有关ftp的信息。
2、设置图片特效
插入图片后,可以有3个标签来选择:图像,高级,效果
图像标签可以用来设置图像的版式,边框。

高级标签可以用来设置图片的大小和调整对比度
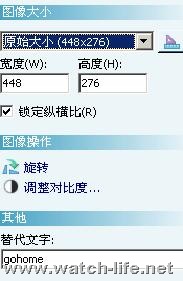
效果标签可以用来设置“水印”特效,非常的方便。

windows live writer 对于那些对图片制作不了解的博友来说,是非常方便而简单制作图片,并内嵌在博文里。
本文地址:http://www.watch-life.net/wordpress/wordpress-windows-live-writer-image.html
微信扫描下方的二维码阅读本文

学习了,多谢楼主,正寻这方面的资料呢。
You seem to know where you’re coming from, and i completely agree.
You are the best! Awesome article yet again. I found this blog the other dayback on yahoo and been keeping up with this fantastic content ever since. You’ve got some killer ideas and I enjoy the info. Keep it going!
Very efficiently written article. It will be useful to anyone who employess it, as well as me. Keep up the good work – can’r wait to read more posts.
嗯,很不错
不过有个插件可以实现:http://gallery.live.com/liveItemDetail.aspx?li=b839fc2f-afa0-4728-8f54-cf4c0d3be8f5&bt=9&pl=8
对于非图片文件的上传,wlw目前不支持
不知道博主知不知道如何用WLW上传非图片文件呢?